

Key Takeaways
Where Basement Moisture Actually Comes From
Basement dampness rarely has a single cause. Understanding the three main pathways helps you match the right fix to the real problem.
Condensation
Warm, humid air enters the basement - through windows, doors, or the house above - and contacts cooler concrete walls and floors. The air cools below its dew point and deposits moisture on surfaces. This is the same process that fogs a cold glass on a summer day. Condensation is especially common in humid climates and in basements used as living spaces with poor ventilation.
Surface Water Intrusion
Water from rain or snowmelt that pools near the foundation can seep through cracks, porous concrete block, or gaps around penetrations like pipes and window wells. Clogged or misdirected gutters are a frequent contributor - when downspouts discharge too close to the house, runoff saturates the soil alongside the foundation. Our guide on maintaining gutters covers how this drainage chain works.
Groundwater (Hydrostatic Pressure)
In some locations, the water table rises seasonally, pushing water laterally or upward through the foundation slab or wall joints. This type of intrusion is harder to address from the inside alone and often requires exterior waterproofing or a drainage system beneath the floor slab.
All Three Sources Can Occur Simultaneously
It is common for a basement to experience condensation, surface water intrusion, and groundwater seepage at different times of year or even at the same time. Treating only one source while ignoring others will produce incomplete results. A thorough diagnosis should account for seasonal variation - conditions in spring may differ significantly from those in summer.
What Dampness Does to Your Home Over Time
A wet basement is not simply an inconvenience. Left unaddressed, chronic moisture causes compounding damage throughout the structure.
98%
Basements that experience some water problem
Industry estimates widely cited by waterproofing associations suggest the vast majority of basements experience some form of water infiltration over their lifetime.
24-48 hrs
Time for mold to establish on wet materials
The EPA notes that mold growth can begin on damp building materials within one to two days under the right temperature and humidity conditions.
- Mold and mildew: Mold colonies can establish on wood framing, drywall, and insulation within 24-48 hours of sustained moisture - and the spores circulate through the entire home via the HVAC system.
- Structural wood rot: Floor joists, sill plates, and beams sitting in damp conditions soften over time, reducing load-bearing capacity.
- Efflorescence and spalling: Mineral salts carried by water deposit on concrete surfaces, eventually causing the face of the block or poured wall to flake apart.
- Foundation wall movement: Freeze-thaw cycles in moist soil push against foundation walls, contributing to bowing or cracking over years.
Air quality effects extend upstairs: musty odors, elevated humidity, and airborne mold particles affect the whole household. The patterns that signal developing damage are described in our article on spotting water damage before it spreads.
Do Not Ignore Horizontal Wall Cracks
Horizontal cracks in a basement wall - especially in concrete block construction - can signal serious lateral soil pressure against the foundation. Unlike vertical shrinkage cracks, horizontal cracking may indicate structural movement. Stop any DIY work in the area and consult a licensed structural engineer before proceeding.
Diagnosing the Source Before You Treat It
Applying the wrong solution wastes money and may mask the problem rather than resolve it. A simple test helps distinguish condensation from intrusion.
The Plastic Sheet Test
Tape a roughly 12-inch square of plastic sheeting directly to a damp wall, sealing all four edges. Leave it for 24-48 hours. If moisture appears on the room-facing side of the plastic, the problem is condensation from interior air. If moisture appears behind the plastic - between it and the wall - water is migrating through the wall from outside.
Inspect the Exterior First
Walk the perimeter of your home after a heavy rain. Look for soil that slopes toward the foundation, window wells without drainage, and downspouts that terminate within 4-6 feet of the house. Many basement moisture problems respond to exterior corrections alone.
After a heavy rain, press your palm flat against the basement wall in several spots. A cold but dry wall points to condensation risk; a wall that leaves your hand damp despite no visible dripping usually signals seepage through the masonry.
This quick tactile check supplements the plastic sheet test and helps narrow the diagnosis before investing in any solution.
When re-grading around the foundation, use dense fill soil - not topsoil or mulch - for the first foot or two adjacent to the wall. Organic material retains water and can make drainage worse, not better.
Porous organic fill near the foundation keeps moisture in contact with the wall longer, undermining the benefit of the slope correction.
Also check insulation placement and vapor barriers in crawl spaces or rim joist areas. Misapplied insulation can trap moisture against framing - a topic covered in depth in our guide on common insulation mistakes.
Common Moisture Control Strategies
Solutions range from simple maintenance tasks to significant waterproofing installations. Start with the least invasive options and escalate if needed.
Improve Exterior Drainage
Re-grading soil so it slopes away from the foundation at roughly 6 inches over the first 10 feet is one of the most cost-effective interventions available. Extending downspout discharge away from the house, cleaning gutters regularly, and adding window well covers reduces the volume of water reaching the wall.
Seal Cracks and Penetrations
Small cracks in poured concrete walls can be filled with hydraulic cement or polyurethane injection. These are surface treatments, not structural repairs, but they limit water pathways for minor seepage. Gaps around pipe penetrations should be sealed with an appropriate waterproof caulk or hydraulic cement.
Control Interior Humidity
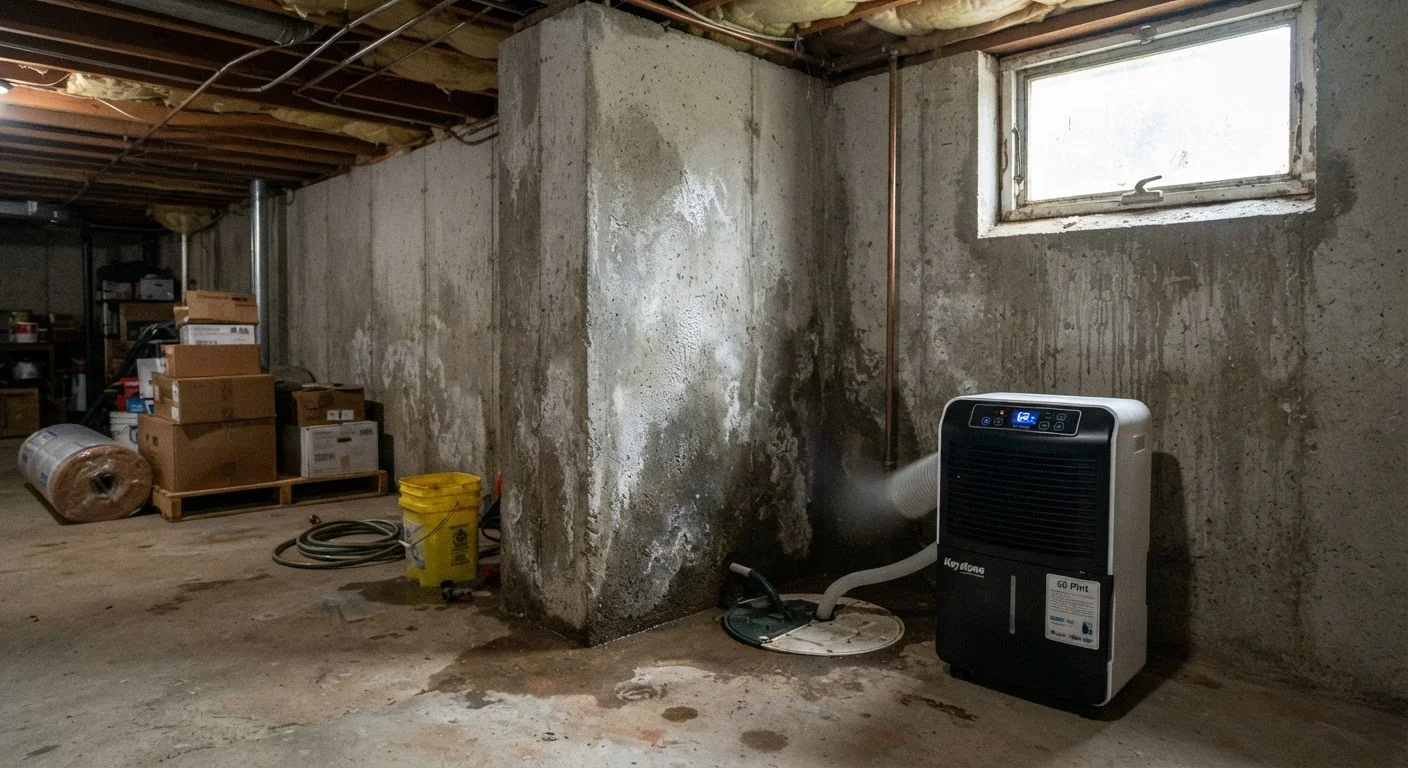
A properly sized dehumidifier maintains relative humidity below 50-60%, reducing condensation on cool surfaces. Ensure the unit drains continuously if possible, rather than relying on manual emptying. Improving ventilation - through exhaust fans or air sealing between the basement and upper floors - also reduces humid air infiltration.
Interior Drainage Systems
A perimeter drain channel installed at the base of interior walls, directing water to a sump pump, is a common solution when exterior waterproofing is impractical. This approach manages water after it enters rather than stopping entry, but it can be highly effective at protecting the interior.
Start Outside Before Spending Inside
Exterior grading corrections, downspout extensions, and gutter maintenance cost a fraction of interior waterproofing systems and resolve the majority of common seepage cases. Exhaust these options first, then reassess after one or two full wet seasons before committing to more invasive work.
When to Call a Professional
Some moisture situations exceed what careful DIY can resolve. Seek a licensed waterproofing contractor or structural engineer when you observe:
- Horizontal cracks in block or poured walls, which can indicate lateral soil pressure and potential structural failure
- Bowing or leaning foundation walls
- Water entering through the floor slab, suggesting elevated groundwater or hydrostatic pressure
- Recurring seepage that persists after exterior drainage corrections
Before hiring, get multiple written estimates and ask contractors to explain the moisture source diagnosis behind their recommendation - not just the product they plan to install. A contractor who skips diagnosis and jumps straight to an interior membrane system may be overselling a solution.
Roof-to-foundation water management is interconnected. Unresolved roof leaks can mimic basement moisture symptoms in some cases; our article on how roof leaks escalate explains that connection. For persistent issues, a whole-home moisture assessment by a qualified inspector provides a fuller picture than addressing each symptom in isolation.
This article provides general home maintenance information for educational purposes only. It is not a substitute for assessment by a licensed contractor, structural engineer, or home inspector. Local building codes and soil conditions vary; consult qualified professionals before undertaking significant foundation or waterproofing work.